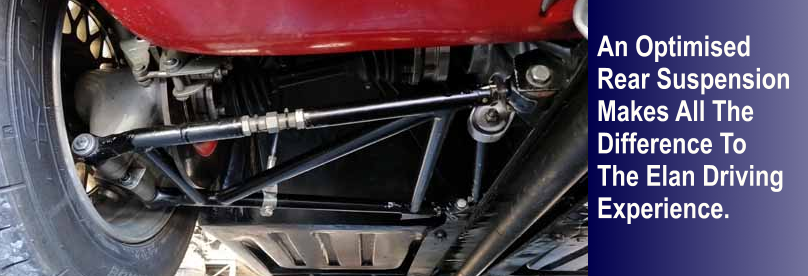
Rear Suspension Toe Adjustment Is A Standard Feature On Most High Performance Cars.
But, there is a common belief of many elan owners that there is no need to alter front or rear suspension settings – The reason to not alter things probably harks back to the era of the late ACBC, (Make it adjustable and they’ll get it wrong) and to a large extent, by present day purists.
But as many elan owners are now discovering, the some after market rear suspension replacement A arms do not deliver the required toe and alignment specifications, and as a lotus owner you would understand that if the suspension on the elan is not aligned correctly, the handling wont be at its best.
So What Does One Do?
Option 1: Do nothing, and put up with an elan that does not perform/handle as you would expect it to.
Option 2: Install a toe adjuster kit, which is a custom made device produced with a Right Hand-Left Hand threaded turn buckle, coupled with a pair of like threaded weld-in threaded plugs which are installed into the rear most tube of the rear lower A arm.
You may or may not have the engineering skills to carry out the mod, if not, take it to your professional fabricator.
The RH-LH adjusters allow a minimal tweaking of the A frame – Eg, we are talking a minimum movement of 0.05 mm (0.00196″) to a maximum of 1.5mm (0.05905″) at most, an absolute minimal amount without putting undue stress on the A arm – And once the toe is set – the lock nuts are nipped up, there will be no further need for any adjustments, unless required for some other reason, but the adjustment facility is always there.
The adjustment may require plus or minus, IE, lateral in or out movement, depending on which way the wishbone needs to be tweaked to obtain correct toe alignment.
Now, I can already hear the groaning noises from the armchair engineering experts reasoning why this should not be done… stretching or pulling (As minimal as it is) a tubular metal structure is taboo in their book.
Perhaps many people do not understand that the standard rear lower A arm of the elan contains a large amount of unwanted inbuilt stress… something that will be quickly realized when/if the A arm tubes are cut, because the cutting blade will either be jammed, (Be very careful) or the wishbone frame will spring the other way, and leave a gap of about 1.5mm.
The lower A frame wishbone is manufactured from ordinary mild steel (MS) drawn or Electric Resistance Welded (ERW) tubing, take a look inside of a sectioned tube, the ERW seam is quite visible, this MS tubing can be welded with TIG, MIG, or gas (Oxy Acet) welded with bronze. Drawn tubing on the other hand, has a very smooth bore.
If some of the pundits out there are telling/you/me/us that the lower A frame toe adjustment should not be implemented because of implied stress, (It is inherent at the build time as prev explained) and it doesn’t matter if the A frames have been TIG welded, or gas welded with a bronze fillet, it is common knowledge that replacement A frames don’t seem to be aligned correctly – Hence the need/requirement for toe adjustment.
There are several lotus elan and plus two elan cars driven on the race track and the road (Including the writers S2 elan) which have been converted with the toe adjustment kit, as well as the camber adjuster kit employed on the lower A arm wishbones, and we are happy to report that after having covered many thousand of KMs, there has been absolutely NO issues with A frame fatigue or breakages.
New A frame wishbones are available incorporating these latest mods, but to be honest, there’s no need to do that because existing lower rear A frames or wishbones fabricated from MS round tubing can be readily converted with toe and or camber adjustment kits.
But, if your elan has lower A frame wishbones built from oval section tubing, then this toe correction product will be of no use to you, because the “weld-in” fittings cannot be installed into the oval shaped tubing
The toe adjuster conversion is a worthwhile project to obtain optimum toe settings on the rear of the lotus elan.
Most lotus elan cars probably have camber settings on the rear that range from 0 deg to perhaps +05 deg positive… which does not help the handling in any way.
With the optimum rear toe in setting of 1.5 to 2mm per side, and 1 Deg negative camber per side, will convert your elan into a beautiful handling elan. The difference is quite astounding.
(NOTE – The toe adjuster conversion operation is separate from the camber adjuster conversion operation, but thought it was best to describe both here on the same page to provide a more complete understanding, they can, and are often installed at the same time)
The Special Components Required For Toe Adjustment.
Each lower A arm requires the following custom made parts for toe adjustment – Optimum toe in: 0 to 1.5mm per side. (Camber adjustment components are also available on request).
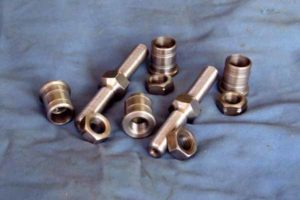
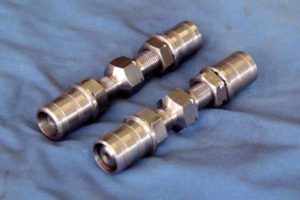
- Two x RH-LH threaded spigot or turn buckle.
- Hex Lock Nuts: 2 x LH – 2 x RH.
- Four weld-in steel threaded plugs – Two x RH – Two x LH, the weld in threaded ferules are pushed inside of the A frame tube and TIG or bronze welded in.

As you can see, there are ten parts that make up the toe adjusters. This method of being able to correctly adjust and set the toe of the elan rear suspension will make a big difference to the way your car will handle and drive. Sure, there is time and expense involved, but it is a special tweak to make your elan a better handling car than it ever was previously.
It is necessary, that after the conversion has been installed, a comprehensive alignment and resetting of the rear suspension be carried out, the laser or optical alignment bench is by far the most accurate alignment method, and one that we highly recommend.
No, you definitely do not have to do this conversion work, no one is forcing you to do anything, but to be honest, it will make a big difference to the handling, we did the mod to our S2 several years ago, and we’ve also converted wishbones for other people, and all have noted considerable improvement in handling, and a more exciting car to drive.

The threaded ferules at each end of the LH – RH turnbuckle shaft, can be TIG welded or bronze welded into the A frame tube, there is no chance that the sleeves will pull out of the tubing.

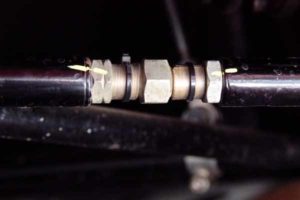
Once the toe adjusters have been installed onto the lower A frames, (As above) and the A frames are re-installed back into the car, followed by setting the correct toe alignment, the lock nuts can be tightened, it is also wise to make some simple thread protectors from clear plastic tube wrapped and held on with zip ties as shown.
There is a process and procedure to follow when carrying out the toe conversion, we provide instructions with each adjuster kit. If you have the required above average mechanical and welding skills, then it is possible to do this as a DIY project, but if you feel unsure, we recommend that you seek professional help and guidance, or perhaps even let the pro carry out the installation, but that is entirely your choice.
With the car set up on the alignment bench, the toe adjustment can be done via the turnbuckle, all that is generally required is about one half to a full turn (max) in either direction to achieve the optimum toe setting, the lock nuts are then nipped up, and locked, and that’s how each adjuster will remain. Toe settings may need to be checked from time to time, and as you will realize with special toe conversion, that is not difficult to do.
Place Your Expression Of Interest – Toe Adjuster Kit Pair.
Shipping Worldwide – Coming Soon –
Put your name on the list below.
Your details are safe with us – You can unsubscribe anytime.
Disclaimer.
The components supplied are precision machined and of high quality.
If you decide to follow the DIY self install approach, remember that you are responsible for any work carried out on your car,
if your welding fails, or wishbones break due to the work that you have carried out, it is your problem, your workmanship is entirely your responsibility, and no one else’s.
You should seek professional help and guidance before you proceed.